Showing posts with label blender python. Show all posts

2011-04-05

WebGL - TED DXML importer again

The test file: (Run locally)
http://www.gocaco.com/webgl/test1/Archive.zip

The exporter for blender (Export your own model to test)
http://www.gocaco.com/webgl/igtl_export_ted.py

Instructions:
  • Make a new folder somewhere.
  • Unzip Archive.zip into it. There will be a .html and a.js file.
  • Copy the igtl_export_tex.py into your Blender/scripts directory. (check infopanel for location)
  • Open Blender (2.49b?) and open a model.
  • In blender, File->Export->IGTL TED (.dxml)
  • Change your options, do NOT use JSON mode.
  • Copy your exported file to the new folder.
  • Run the index.html in your browser (doubleclick it)
  • Type in the name of your file in the bottom and click load.
  • Now you should be able to use left drag, right drag and left+right drag to view around.

Now I have added in scene loading so it can load in lists of objects, all of which can move/translate/scale.

Also multi-texture is working, but no shaders are coded yet that use it. That'll be after animations, since animations are done in the shader. This is why the TED exporter is valuable, it automatically splits up your mesh into groups by material, seams, and matrix palette seams.

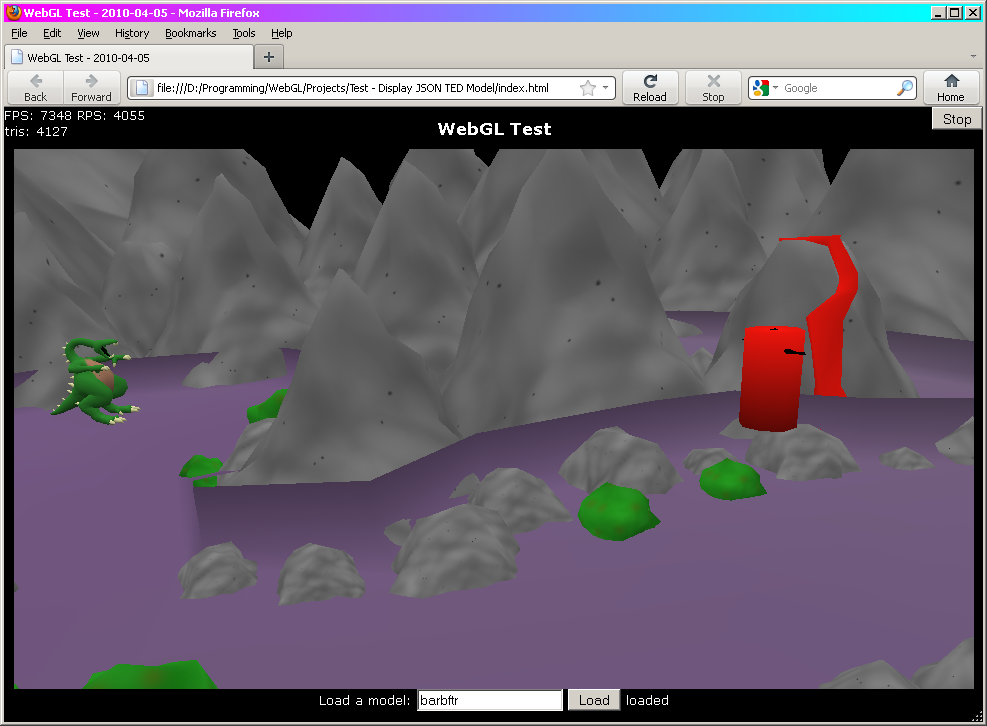
Here's a random scene I made. Don't make any comments about old school games, yes I know what "Dungeons of Drax" is. If the shaders were working it would look better.


Animations next...
-Z

2011-04-04

WebGL - TED DXML importer

So I redid some javascript; Now I have a stronger preliminary system for loading data from TED files. It's scary fast, and impressively so. (The GL part anyways)

So, make sure you export ONLY data in the TED format, not the JSON format. Use the TED format because it's a lot easier to read and understand, and it's not much less efficient than a JSON file (Maybe 1% tops).

You must export your own test model for now, from blender. Download the source here to try it on your local machine

TED Exporter (test 2.49b, not yet 2.5* compatible):
http://www.gocaco.com/webgl/igtl_export_ted.py

Download the python file, put it in your blender scripts directory (blender/.blender/scripts for me) or add it on to your 2.5 (not tested, API not stable)

Then open any file you want, and select some objects, then File->Export TED.
You may want to poke through the python a little to read something about what it does.
Save your exported ted file (All ted files are UTF-8 ASCII only, so always human readable) and place it wherever you extracted the source index.html.

Then, just enter in the name of the file and click load, nothing nothing breaks.

You should be able to fly around a (currently non-objected) world with left mouse and right mouse drags, left+right mouse is zoom, left is rotate, right is pan.

I do not yet have the scene objects loaded, nor do I have the animations active. That's next. But this is progress, I can now load data into the webgl, that includes models, textures, and animations.

Here's Gigginox from Monster Hunter 3. Not doing much.

-Z

2011-04-02

WebGL - Blender Exporter to JSON format

EDIT (2010-04-03): JSON is a bad format. I'm remove support for it in favor of the XML already in place. XML parsers read DXML easily, so the original TED files remain as is. Reason: JSON cannot handle multiple nodes with the same name. Crippling.


Since I already have a very heavy exporter built for blender, and it just so happens to be in the DXML format, I can directly convert it to a JSON with almost no loss of information.

So, if you are frustrated with not having a prebuilt Blender -> JSON exporter, use mine (or copy + improve on it).

The download link is always on the right hand side of my blog, or here since this post is about the exporter:

http://www.gocaco.com/temp/igtl_export_ted.py

You might wonder "why do I want yet another stupid format". GOOD QUESTION.
The "TED" file is designed to mimic hardware formats.
It exports:
  • Optimized mesh data (automatically splits along UV seams, and material seams, and matrix palette splits. Exports vertex, texcoord, normal, tangent, weight, weightindex, maybe colors)
  • Material information (As much as possible for now, needs improvement)
  • Armature data (all of it, including IK chains)
  • Animation data (All actions that fit an armature)
  • Frame actions (You can make text files with scripts that can act as data for animations)
  • Textures (Can be converted to text and put in the file)
  • Scenes (Converted exactly as shown)
  • Objects (including game properties! And links to data.)

So, it's also all fairly logical. You will have to play with it to get used to it, especially for you novice's out there. Reading through the exporter (find the "const_DTD_ted" declaration) and looking at what the data is should help. Try exporting a regular TED file first, and open it with any text editor. DXML files are regular, very restrictive XML files to promote consistency and easy of reading. It should be immediately obvious how to read them in.

More importantly, for you beginners, the data exporter from the TED exporter is everything you find normally in any commercial game out there. This includes X360, PS3, Wii games, as I have tested and proven myself.
It does NOT export some advanced features, because blender does not have those features yet. Bother blender.org about that if you want more functionality with muscle/keyframe animation.

If you do end up using this, enjoy. Please drop some credit somewhere; there are no restrictions or guarantees to this script. It's 100% free as in free beer.

A early preliminary test:

I will add a animated test soon.

-Z

2010-05-14

TED file format; Restricted XML

Ever notice how awful XML documents are?

Well, I upgraded my model exporter from blender to 2.49b; so now, instead of the annoying variety of formats I used to use (obm, arf, brf arf2.0, brf3.0, grf, iRF) I decided to spec out a more logical, easier to understand but far more byte/size inefficient DXML format.

I call it "TED" (Text Extracted Data).

The goal of TED files is to export the maximum usable, useful information out of Blender 2.49b+.
  • This includes Meshes, Armatures, Animations, Objects, Materials, Textures, and some scripting and logic elements. Meshes should contain enough data to be GLSL renderable (IE normals, tangents, uv layers, parameters).
  • TED files must also conform to a very strict file standard, so there will be NO allowed coordinate systems other than the default universal correct system (RHR, +X forward, +Y left, +Z up; This is universal for ALL transforms. Matrices also have a standard definition of Xx Xy Xz Yx Yy Yz Zx Zy Zz where X is the forward axis, Y is the left axis, Z is the up axis. Quaternions follow these definitions as well.) 
  • TED files must be easy to read in; Though they are not (byte) efficient, they should contain "hints" for a loader so it may allocate elements beforehand; for example declaring the number of elements in an array before reading it in. You might notice .TED files can be
  • TED files must maintain a logical and render-system friendly data model; And must encapsulate all data elements; No element can have differing types of data; ergo a tag can store an array of strings, an array of ints, an array of floats, or other tags ONLY.
Why TED files? Because my old exporters did not generate shader code or export tangent vectors. Also, the old exporters somewhat obsfuscated the data, and did not present it in a correct hardware manner; There are fixed graphical paradigms in working with 3D polygonal data; TED files will adhere to them strictly and yet maintain enough data to be edit-friendly.

What TED files should NOT be used for:
  • Final game data (you should convert to your own or local host format)
  • Final Level descriptions (TED files do not provide hashing or optimizations or portals of scenes)
  • Replacing something you already understand (unless it has something you need; just make a converter to convert TED to whatever)
TED files could possibly be placed in direct competition with other formats, such as "OGRE XML", "COLLADA", "Alias Wavefront .obj", "Direct X 8.0 .x" and other such lexical, human readable formats. None of those formats contained all of data I wanted to use, therefore I made .TED files. It would be a trivial exercise to convert FROM TED files to those formats, but the other way around is much more difficult due to those other formats inefficiencies and shortfalls in dealing with hardware level data. Yes, I've used all those formats before, and yes I have used and loaded .3ds, .mshp, .md2 .md5 and many many others. So no, the format you are thinking of also sucks.

I have not made the exporter for 2.5.2 yet because I have been burned many times by blender changing specifications mid-stream on me. Luckily, the ted exporter is written to avoid this as much as possible; but when more alpha versions come out I will snap one in easily. Until then, 2.49b it is.


If I could show you a .TED file I would; but HTML can't understand < > signs.

Have a dragon instead (All credit goes to DragonBlade from the Wii; Obviously I'll never use this model, it just happens to be the first example I picked)
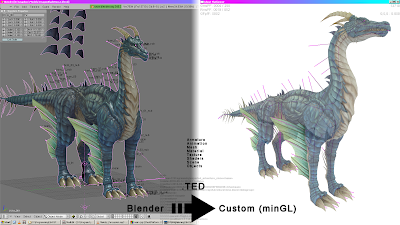

Blender on the left, mingl without GLSL on the right (in-game)

-Z
2009-11-05

Cube Sphere

The Naiive implementation of making a Cube a Sphere is to make a cube, then select all verticies and "Mesh -> Transform -> To Sphere". This results in severe distortion along the principal axes, and a poor approximation of a sphere, as a result.

A more correct implementation is to notice that this is analogous to taking two planes centered at the origin, and rotating them n time in discrete angular intervals, thus chopping space into uniform areas, resulting in far less distortion.

Neither approach is perfect because you cannot comb a hairy sphere smooth. But the Cube Sphere is far superior, and easier to generate using a difference equation.


Cube Spheres are good for working with planets and large scale data, but don't have many other uses besides easier texturing of spheres.

..I can;t seem to figure out how to post data to blogger... how to post a .py script?

It's not 100% perfect; copy paste into notepad or something

Here goes nothin':

#!BPY
"""
Name: 'CubeSphere'
Blender: 249
Group: 'AddMesh'
Tooltip: 'Creates a Cube Map sphere'
"""
__author__ = "Izcalli64"
__url__ = ("blender", "http://imaginaryz.blogspot.com");
__version__ = "0.0 2009-11-05"

import Blender
import math;

def generate_grid( ndiv, spanning ):

    #
    #Optimal spanning value: Unknown
    #Optimal spanning equation: Unknown
    #

    radius = 1.0;    #Fixed; don't vary this.
    points = [];
    ndiv = int( ndiv );
   
    #From experiment; It looks like you need a transformation from radial space to manhatten space:
    #
    #the only fixed points are the 4 corner points, from which there are lateral and vertical lines;
    #These lines must have points distributed on them evenly, by angle.
    #These lines are NOT consistent, but do consist of great circle arcs.
    #
    #SOLUTION:
    #
    #Generate a cube sphere by taking 2 lists of evenly distributed angles;
    #Generate the great circle planes (planes) that intersect the angles;
    #Calculate all points on the grid that are the intersections of both:
    #    The sphere of radius R
    #    Great circles A and B (will always form a line, no matter what.
    #The result:
    #    Quite a substantial amount less error than the other method. (see .blend)
    #The problem:
    #    Hard to optimize
    #
    dtr = math.pi/180.0;
    mina = 45.0 * dtr;    #Minimum angle (45 = pi/4)
    maxa = 135.0 * dtr;    #Maximum angle (135 = 3*pi/4)
    rangea = maxa - mina;
    dela = (maxa - mina)/float(ndiv-1);
    spanrange = dela * spanning;

    #Generate strip angles (for consistency)
    stripa = [];
   
    stripa.append( [ mina, math.sin(mina), math.cos(mina) ] );
    idex = 1;
    ia = mina + dela;
    while( idex < (ndiv-1) ):

        #Default angles (angular evenness)
        #stripa.append( [ ia, math.sin(ia), math.cos(ia) ] );

        #Corrected angles:
        delv = 2.0 * ((float(idex)/float(ndiv-1)) - 0.5);    #-1.0..1.0 range
        dels = 0;
        if( delv < 0 ):
            dels = -1.0;
        elif( delv > 0 ):
            dels = 1.0;       
           
        #Correction quadratic equation (B-spline could be more effective)
        #ian = dels * (delv*delv) * spanrange + ia;
        #ian = -dels * (1.0 - (delv*delv)) * spanrange + ia;
        ian = -dels * (1.0 - abs(delv)) * spanrange + ia;#Very simple; linear. Problem is not linear.


        #print delv, dels, -dels * (1.0 - (delv*delv));
       
        stripa.append( [ ian, math.sin(ian), math.cos(ian) ] );

        ia += dela;
        idex += 1;
    stripa.append( [ maxa, math.sin(maxa), math.cos(maxa) ] );
   
    for ex in stripa:
        print ex;
   
    #Generate strips:
    iy = 0;
    while( iy < ndiv ):
        ix = 0;
        while( ix < ndiv ):
       
            #Plane X / Circle X
            PXx = stripa[ix][2];    #cos(x)
            PXy = stripa[ix][1];    #sin(x)
            PXz = 0;
           
            #Plane Y / Circle Y
            PYx = stripa[iy][2];    #cos(y)
            PYy = 0;
            PYz = stripa[iy][1];    #sin(y)
           
            #Cross product (direction vector to use; can be optimized:)
            #nx = PXy * PYz - PXz * PYy;
            #ny = PXz * PYx - PXx * PYz;
            #nz = PXx * PYy - PXy * PYx;
            nx =   PXy * PYz;
            ny = - PXx * PYz;    #Optimized cross product from zero factors
            nz = - PXy * PYx;
           
            #Normalize direction vector
            nm = math.sqrt( nx*nx + ny*ny + nz*nz );
            nx /= nm;
            ny /= nm;
            nz /= nm;

            #Apply scaling of shape
            tx = radius * nx;
            ty = radius * ny;
            tz = radius * nz;

            points.append( [tx,ty,tz] );
           
            ix += 1;
        iy += 1;
       
    return points;
   
def generate_points_swizzle( points, comp0, comp1, comp2, neg0, neg1, neg2 ):

    newpoints = [];
   
    sw0 = comp0;
    sw1 = comp1;
    sw2 = comp2;
   
    for P in points:
   
        np = [0,0,0];#[ P[sw0], P[sw1], P[sw2] ];
        if( neg0 != 0 ):
            np[0] = -P[sw0];
        else:
            np[0] = P[sw0];
           
        if( neg1 != 0 ):
            np[1] = -P[sw1];
        else:
            np[1] = P[sw1];
           
        if( neg2 != 0 ):
            np[2] = -P[sw2];
        else:
            np[2] = P[sw2];
        newpoints.append( np );
       
    return newpoints;
   
def generate_grid_uv( xdiv, ydiv ):

    uvs = [];
    iy = 0;
    while( iy < (ydiv) ):
        ix = 0;
        while( ix < (xdiv) ):

            u0 = float( ix ) / float(xdiv-1);
            v0 = float( iy ) / float(ydiv-1);
           
            uvs.append( [u0,v0] );

            ix += 1;
        iy += 1;
       
    return uvs;

def generate_grid_facelist( xdiv, ydiv, offset_index ):

    faces = [];

    iy = 0;
    while( iy < (ydiv-1) ):
        ix = 0;
        while( ix < (xdiv-1) ):

            fxy00 = int(offset_index + ix + (iy * xdiv));
            fxy10 = int(offset_index + ix + 1 + (iy * xdiv));
            fxy01 = int(offset_index + ix + ((iy + 1) * xdiv));
            fxy11 = int(offset_index + ix + 1 + ((iy + 1) * xdiv));
       
            faces.append( [fxy00,fxy10,fxy11,fxy01] );

            ix += 1;
        iy += 1;
       
    return faces;

def generate_cubesphere( in_radius, in_divisions, in_evenness ):

    #Generate each cube face, simply rotate it's data to match what we want.
    ndiv = in_divisions + 2;
   
    faces = [];
    points = [];
    uvs = [];
    origpoints = generate_grid( ndiv, in_evenness );#x,y,z
   
    faces.extend( generate_grid_facelist( ndiv, ndiv, 0 ) );
    points.extend( origpoints );
    uvs.extend( generate_grid_uv( ndiv, ndiv ) );

    faces.extend( generate_grid_facelist( ndiv, ndiv, len(points) ) );
    points.extend( generate_points_swizzle( origpoints, 2,1,0, 0,0,0 ) );    #x,y,z => z,y,x
    uvs.extend( generate_grid_uv( ndiv, ndiv ) );
   
    faces.extend( generate_grid_facelist( ndiv, ndiv, len(points) ) );
    points.extend( generate_points_swizzle( origpoints, 2,0,1, 0,0,0 ) );    #x,y,z => x,z,y
    uvs.extend( generate_grid_uv( ndiv, ndiv ) );

    faces.extend( generate_grid_facelist( ndiv, ndiv, len(points) ) );
    points.extend( generate_points_swizzle( origpoints, 0,1,2, 1,1,1 ) );    #x,y,z => -x,-y,-z
    uvs.extend( generate_grid_uv( ndiv, ndiv ) );
   
    faces.extend( generate_grid_facelist( ndiv, ndiv, len(points) ) );
    points.extend( generate_points_swizzle( origpoints, 2,1,0, 1,1,1 ) );    #x,y,z => -z,-y,-x
    uvs.extend( generate_grid_uv( ndiv, ndiv ) );
   
    faces.extend( generate_grid_facelist( ndiv, ndiv, len(points) ) );
    points.extend( generate_points_swizzle( origpoints, 2,0,1, 1,1,1 ) );    #x,y,z => -x,-z,-y
    uvs.extend( generate_grid_uv( ndiv, ndiv ) );
   
    #Scale all points by radius value (lol?)

    return points,uvs,faces;
   
def main():
    Draw = Blender.Draw
    PREF_RADIUS = Draw.Create(1.0)        #"Radius" of cube-sphere
    PREF_DIVISIONS = Draw.Create(7)    #Divisions per face
    PREF_EVENNESS = Draw.Create(0.0)    #Evenness of point distribution (by area weighting, so uv texture distortion is absolute minimal at default value)

    if not Draw.PupBlock('Add CubeSphere', [\
    ('Radius:', PREF_RADIUS,  0.01, 100.0, 'Radius for the main ring of the torus'),\
    ('Divisions:', PREF_DIVISIONS,  0, 256, 'Number of subdivisions to generate'),\
    ('Evenness:', PREF_EVENNESS,  -1.0, 1.0, 'Evenness scaling for evaluation'),\
    ]):
        return;
       
    verts, uvs, faces = generate_cubesphere( PREF_RADIUS.val, PREF_DIVISIONS.val, PREF_EVENNESS.val );
   
    #Every vertex has an exact and corresponding uv value to it (sticky uv)
    #As a result, it shall be simple to assign face UV's.

    meshobj = Blender.Object.New( 'Mesh', 'CubeSphere' );
    meshdata = Blender.Mesh.New();
   
    meshdata.verts.extend(verts);
    meshdata.faces.extend(faces);
   
    #Apply uv coordinates:
    meshdata.addUVLayer("CubeMap");
    meshdata.activeUVLayer = "CubeMap";

    if( meshdata.faceUV ):
        for f in meshdata.faces:
       
            vinds = [];
            for v in f.verts:
                vinds.append( v.index );
               
            vdin = 0;
            for vdex in f.uv:
                uvd = uvs[ vinds[ vdin ] ];
                vdex[0] = uvd[0];
                vdex[1] = uvd[1];
                vdin += 1;
       
    else:
        print "#ERROR; Face UV could not be enabled??";
   
    meshdata.calcNormals();
    meshdata.update();
   
    meshobj.link( meshdata );
    Blender.Scene.GetCurrent().objects.link( meshobj );    #Is this deprecated? #ERROR
   
main();
#Blender.Draw.PupMenu("Error%t|This script requires a full python installation")